
kitchen remodel reveal
i’m super excited to finally share this project on the blog! we started working on the kitchen in december and it’s come a long way since we first moved in. i know i said in my last blog that our dining room was my favorite room but this transformation is just too good.
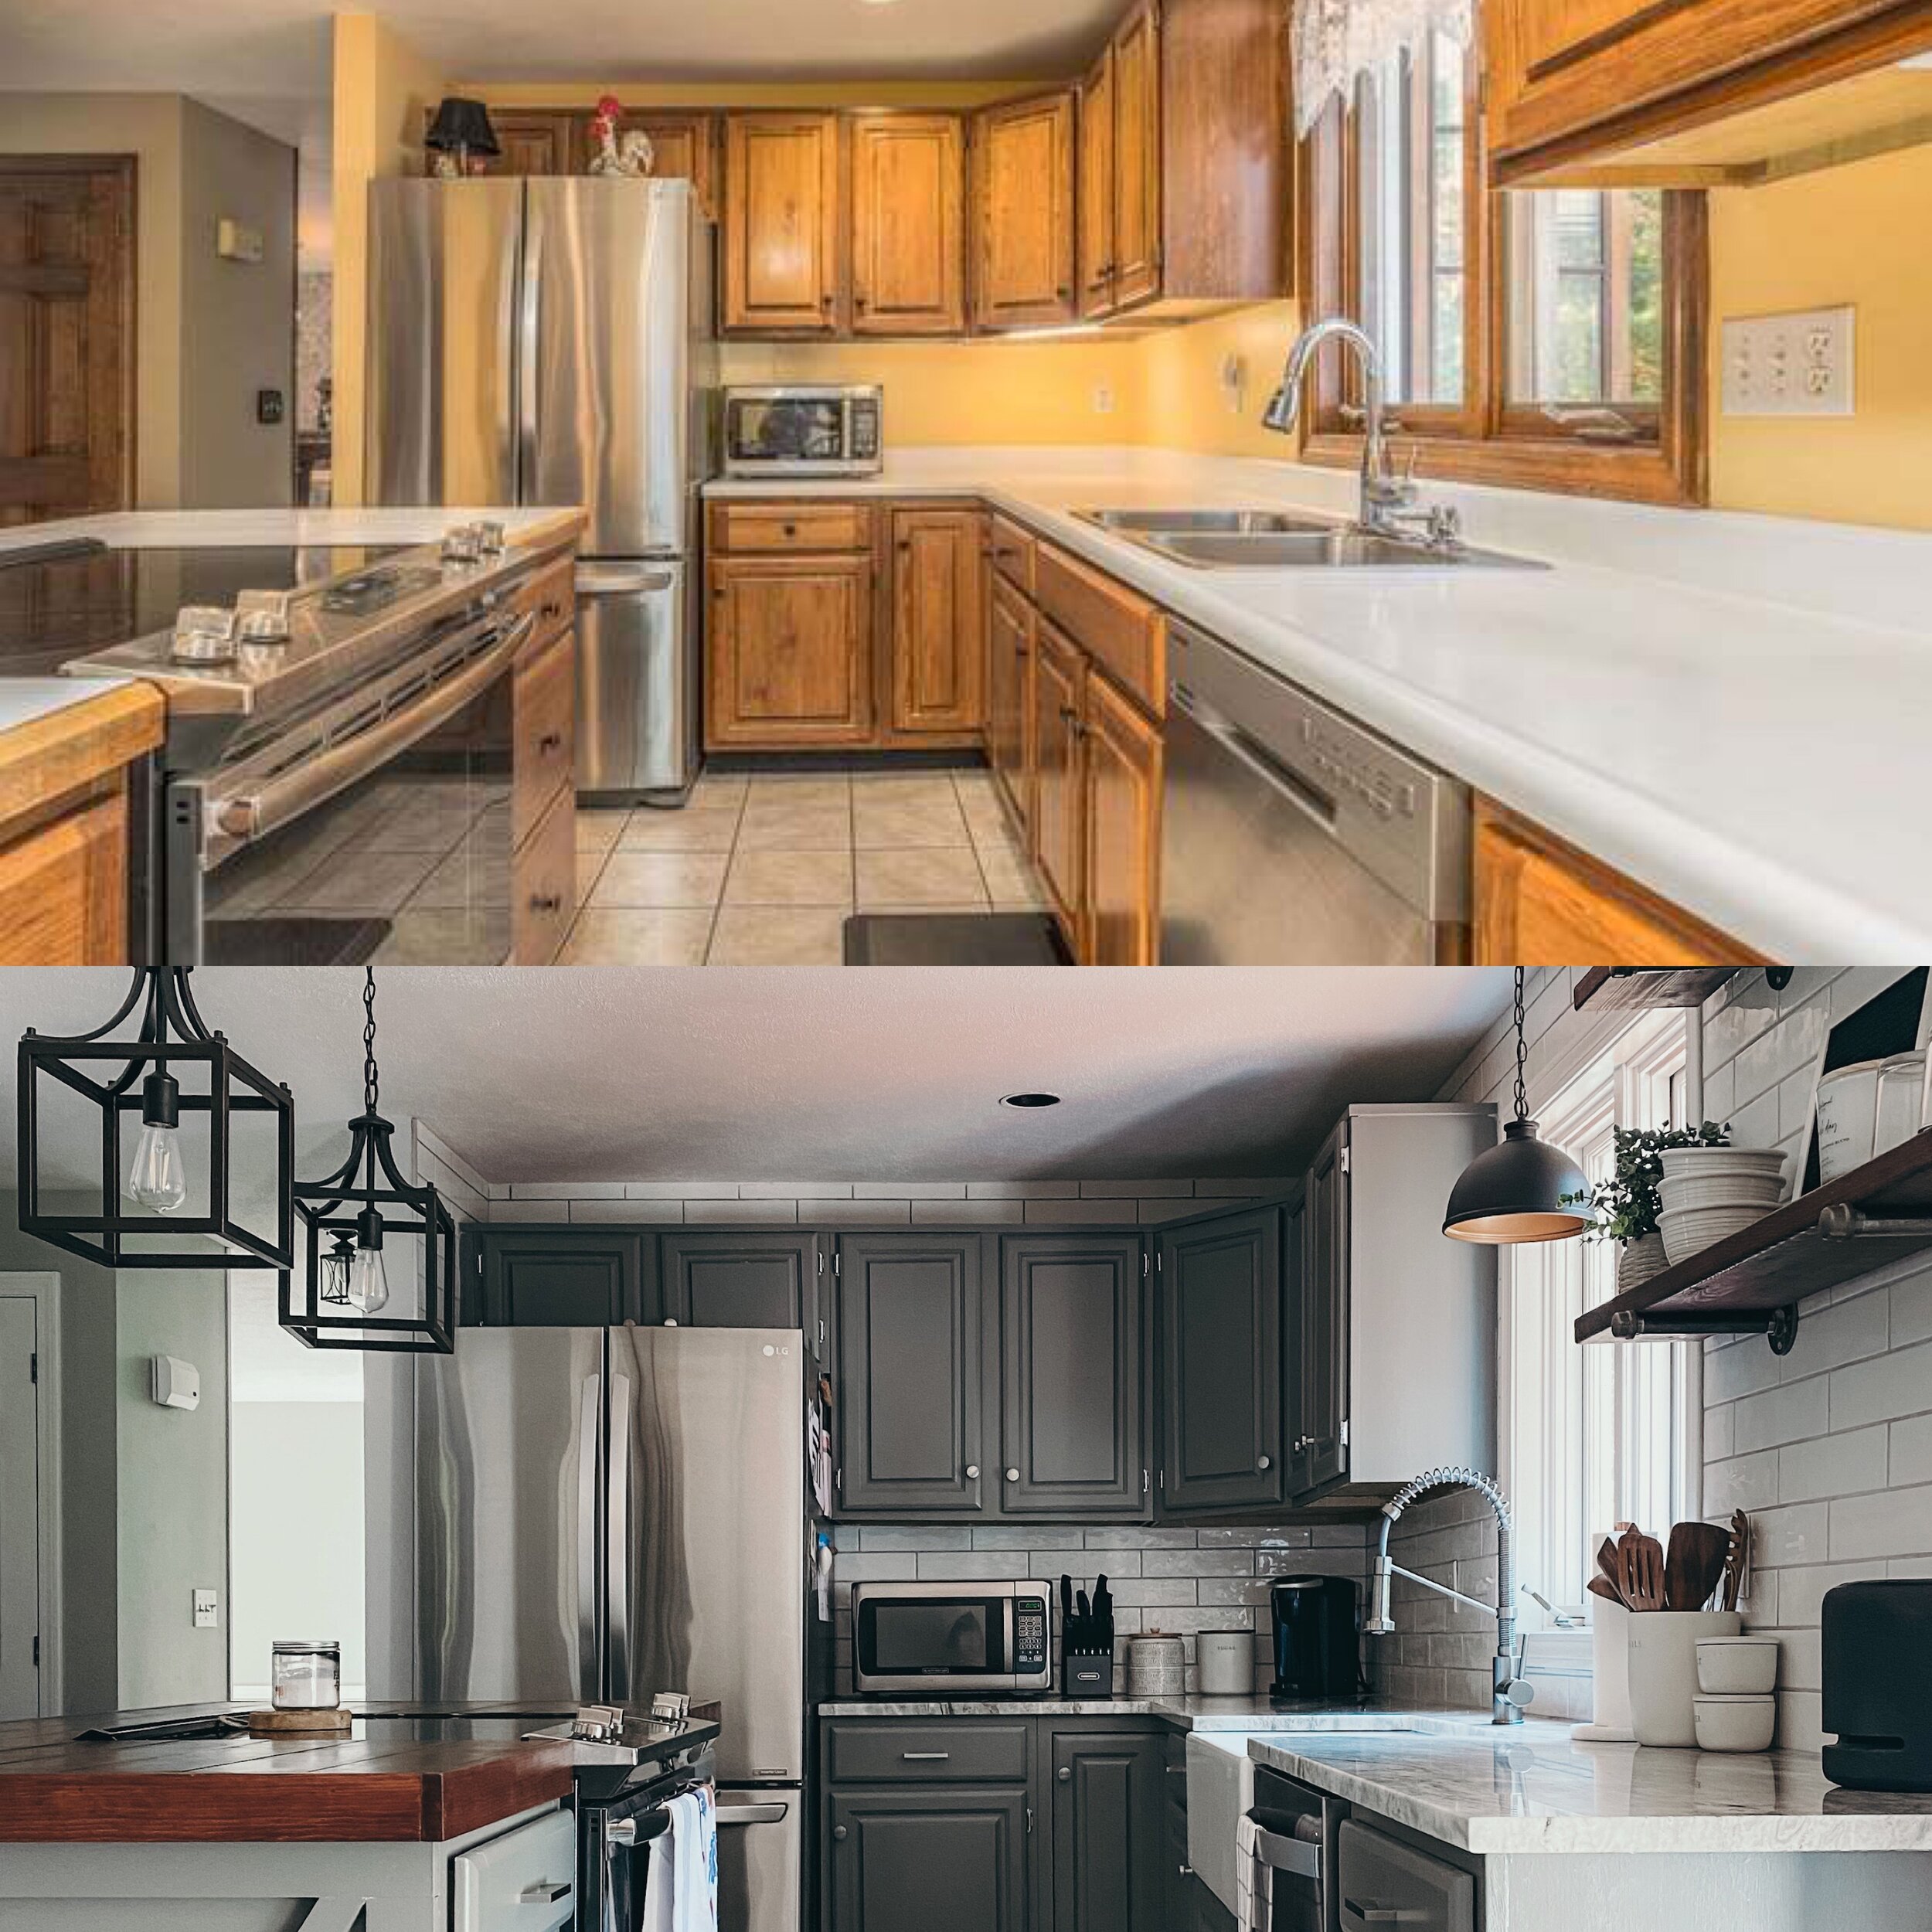
before & after
clearly lots of changes were made to the kitchen in the past few months. we painted the cabinets and walls, and installed new counters, light fixtures, a farmhouse sink, faucet, and more. we also added white subway tile, removed cabinets to install shelves, and completely redid the island. keep reading for all the details!
cabinets/walls
we started by painting the cabinets, which definitely made a huge difference. it took us awhile to find a color we liked but we went with benjamin moore amherst gray which is a great shade if you’re looking for something that’s not too dark but not too light. painting the cabinets was time consuming, but definitely worth it if you’re not looking to break the bank for new cabinetry. we spray painted all the hinges, and for hardware we went with square pulls for the drawers and satin nickel cabinet knobs for the doors, which i think really compliment the color of the cabinets and overall look of the kitchen. we also painted the walls and doors - for the walls, we went with benjamin moore moonshine and for the doors and windows and such we went with sherwin williams alabaster.

one more light fixture to switch out..
island
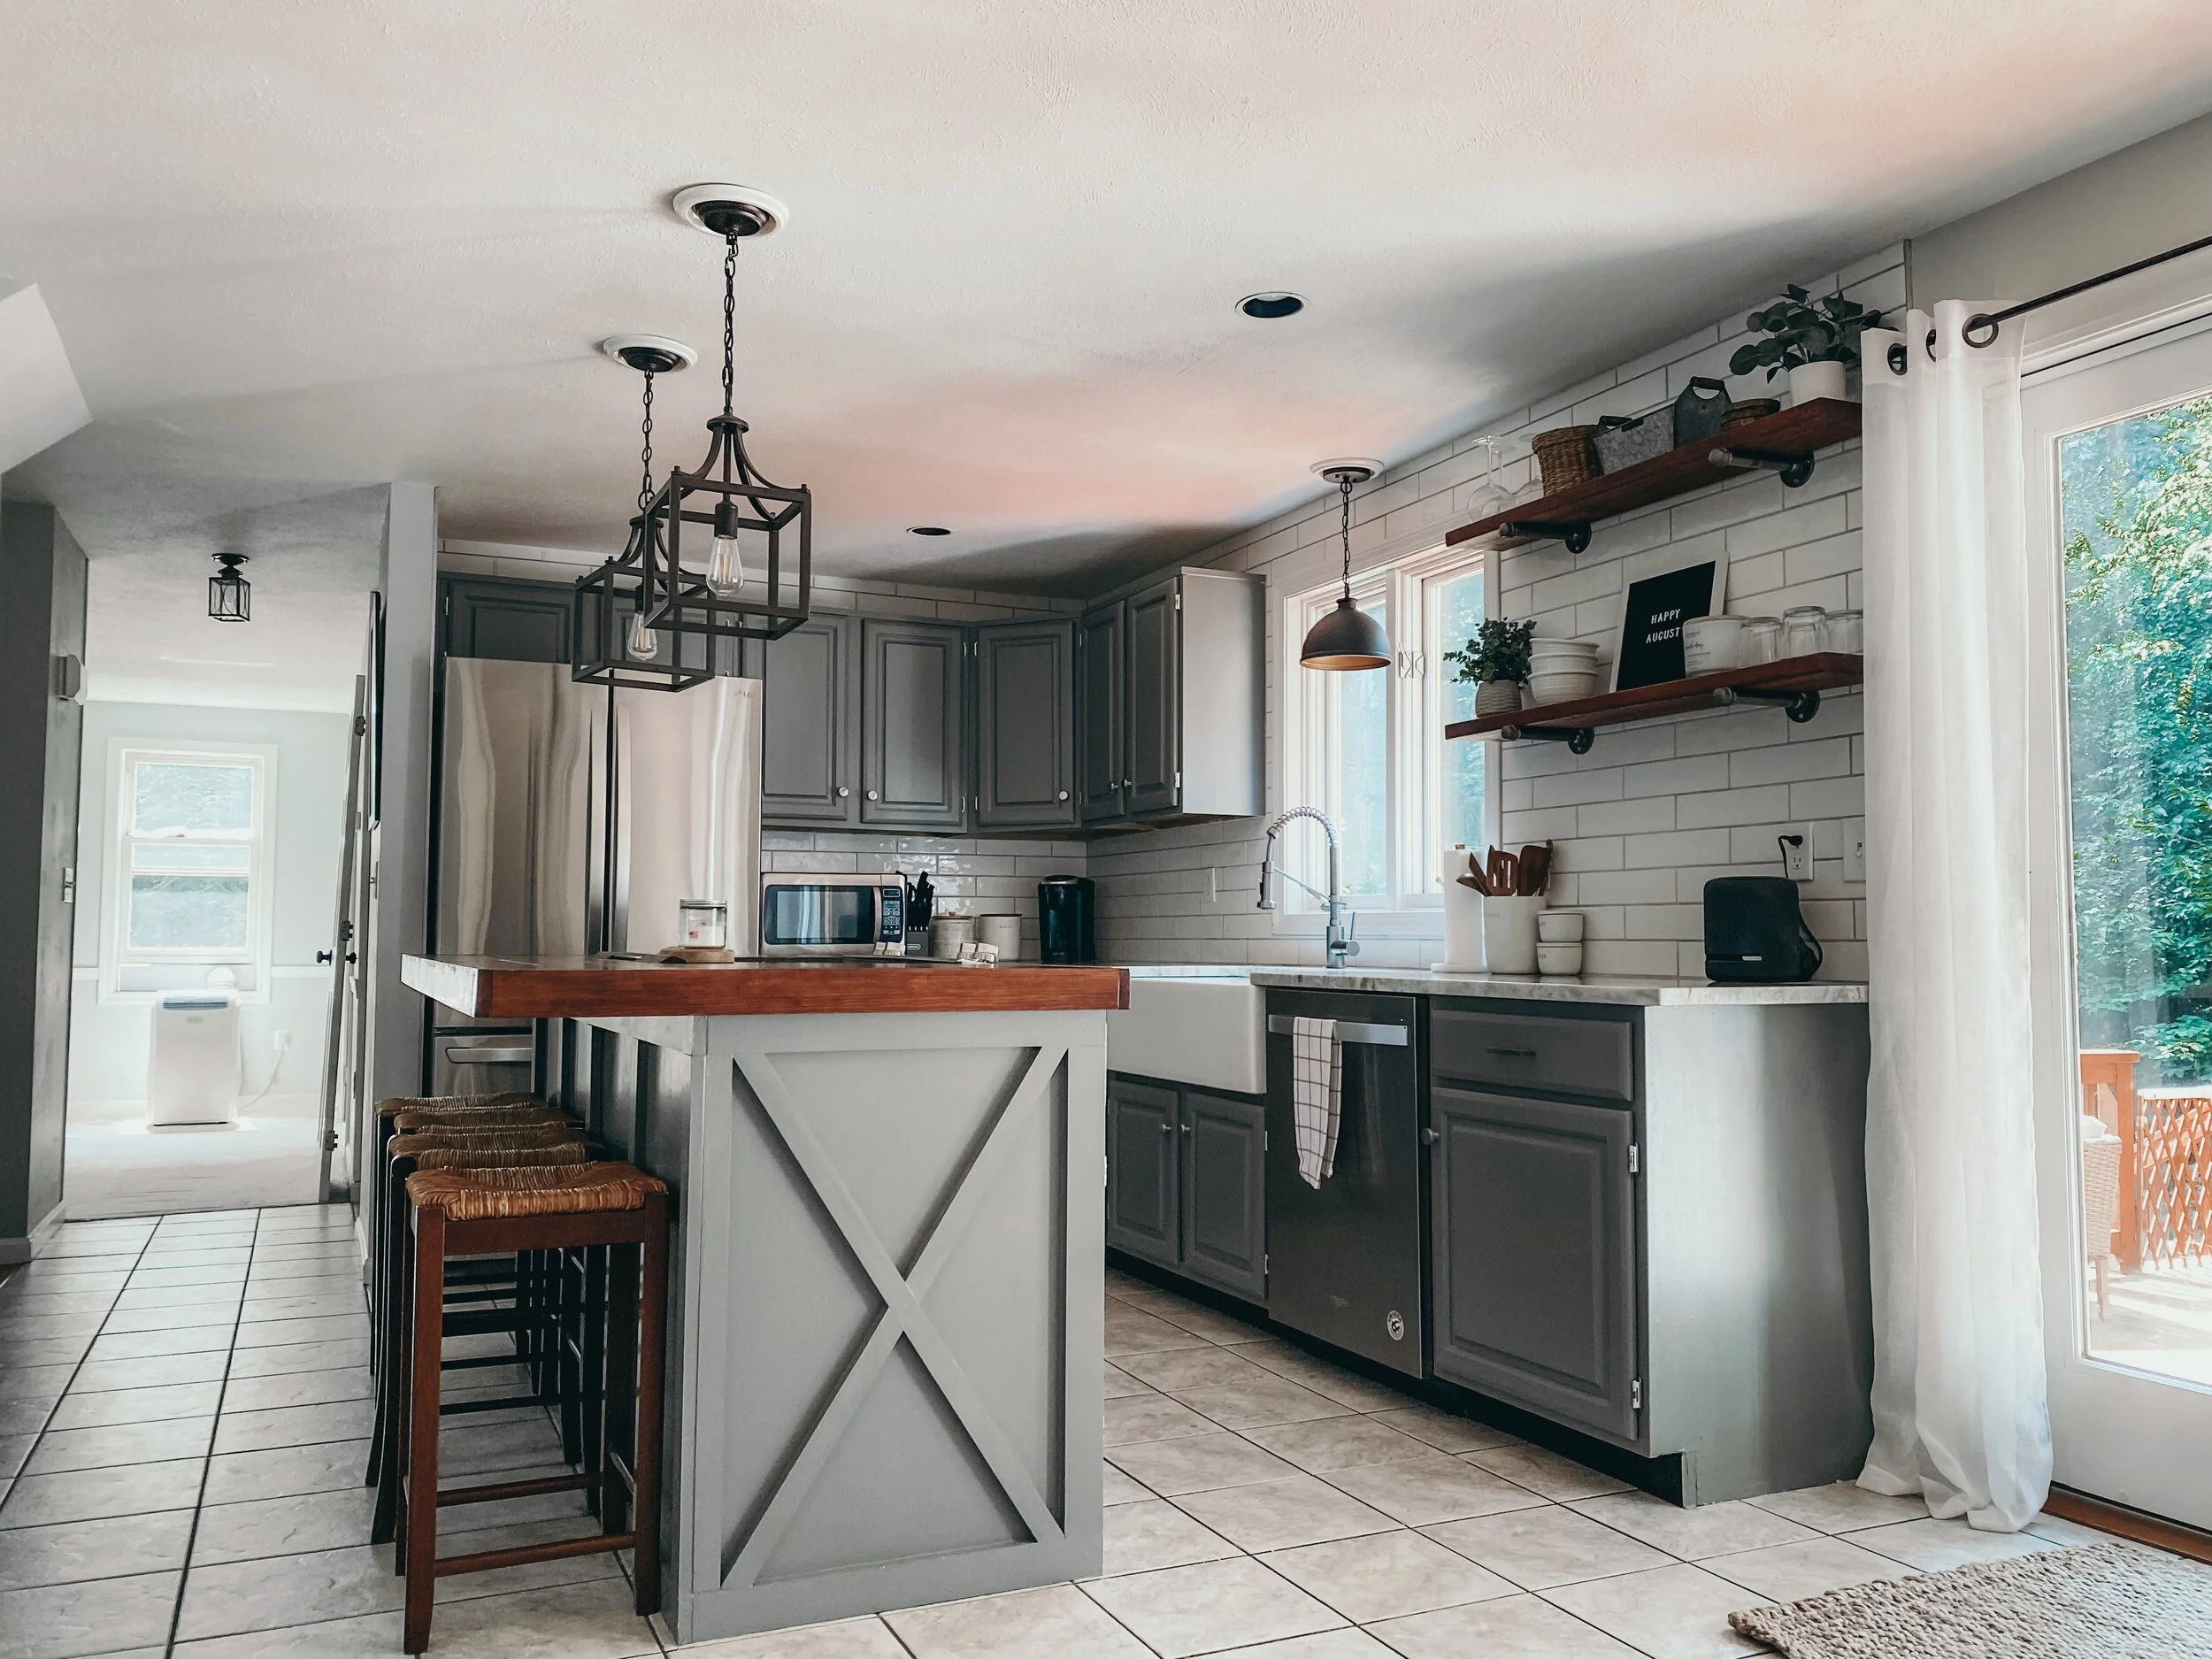
before we redid the island, the top was not our style at all (and not level) and the base was just average. austin demoed the existing island countertop and installed a new top using unfinished pine boards. for a stain we used brown mahogany, which was a bit more red than we had originally wanted but now i actually really like it. we painted the island base the same color as the cabinets, and austin built out the sides to give it more of a farmhouse look. i’m glad we went with a different countertop on the island - it really stands out but still looks good with the granite countertops we chose.
the pendants we chose for above the island are from home depot. they work really well with our space - they aren’t too big and have a similar look/feel to the other light fixtures we installed around the house.


counters + sink/faucet
the counters were the only thing we didn’t do ourselves in the kitchen. it took us quite some time to choose the right stone - we originally wanted something that was all white but ended up going with fantasy brown granite, which i’m still obsessed with even months later. the colors in this stone matched perfectly with our island countertop, gray cabinets and the subway tile we were planning on installing for a backsplash. our counters were done by northeast custom granite - can’t recommend them enough! they did an amazing job and turned this project around in less than 2 weeks.
our farmhouse sink was a christmas gift from austin’s parents, and couldn’t be more perfect! it’s 33” which is pretty big but luckily not too big for our kitchen. for a faucet we both wanted something that was tall and had a pull-down sprayer but not too expensive, so we chose this kraus faucet and love it. above the sink we chose a small black pendant light with gold interior.

subway tile + shelves
honestly i was a little hesitant when austin said he wanted to tile the entire wall, but i’m so glad we did. we went with 3 x 12 white glazed ceramic subway tile and used platinum gray grout. we knew we wanted shelves somewhere in the kitchen so we took down one set of cabinets, tiled that whole wall, and made our own shelves for that space. we drilled black industrial pipes into the tile to support the shelves, and used the same stain as the island countertop. if you can afford to lose the space, i highly recommend replacing cabinets with shelves. we get a ton of compliments on them, and it makes the kitchen feel that much more open.

the kitchen was a huge push - we really wanted to get it done since it’s the focal point of our house (and we really hated the yellow walls that were there before). we worked on it little by little whenever we could and i’m super proud of how it turned out.
below are some more before & after shots, progress photos and more!


